How to connect an NB HMI to a PLC
Introduction
This guide will outline the steps required to connect an NB HMI screen to a compatible PLC, using ethernet. This process uses a CP1L PLC, but can be applied to most CP/CJ/CS/NJ and NX units. If a PLC does not have built-in ethernet, an ethernet expansion unit may be required.
Procedure
Step1
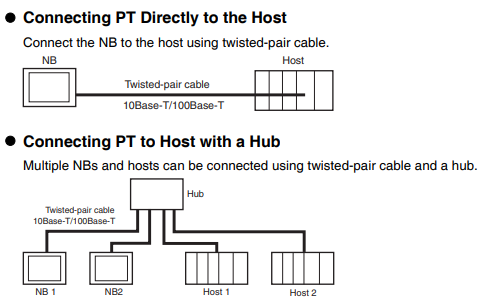
Connect the NB and PLC using the ethernet cable. This can be done directly, or via a networking hub, as shown below.

Note that it is possible to connect multiple devices with the use of a networking switch.
The default IP address of the NB HMI is 192.168.250.1 and may conflict with the default IP address of some PLCs. If devices are not discoverable on the network, this may be the cause. Please see the below guide to remedy this issue.
Step 2
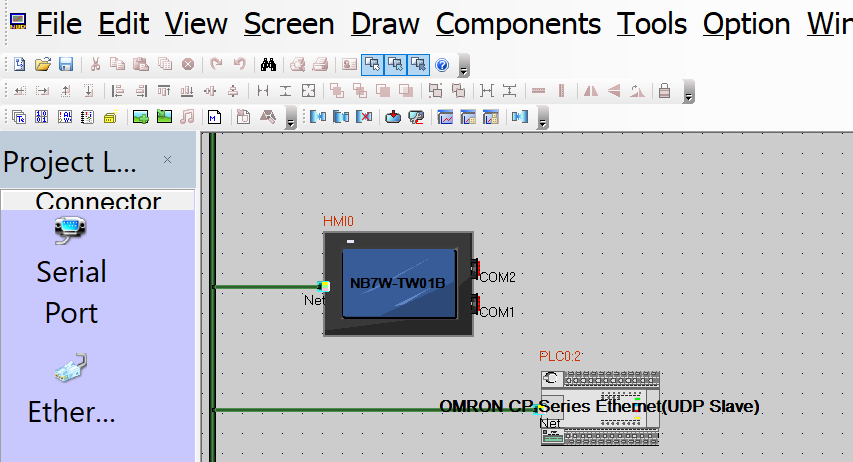
In NB-Designer, place the desired NB HMI and PLC into the Configuration and Setup Window, as shown below.

Select Option -> Communication Setting to enter the Communication Setting window.
In the Communication Setting window, add the devices which are required to communicate. This is done by selecting the 'add' button, and configuring the device's settings. When configuring, ensure that the correct Device Type and Comm Protocol are selected for the connection type required, as well as the appropriate IP Address and other details. Note that the default communication port for FINS protocol is 9600, however this is customizable in the PLC so must match what is set in the PLC.
As an example, when connecting an NB HMI to a CP1L, the Comm Protocol would be 'OMRON CP Series Ethernet'.
Once both (or more) devices have been added to the Communication Setting window, the connection should be complete. Now, NB-Designer can be used to create screen objects that directly interface with the memory areas of the PLC or PLCs.