Ethernet setup for a CP1L-E and a NB screen
Scenario
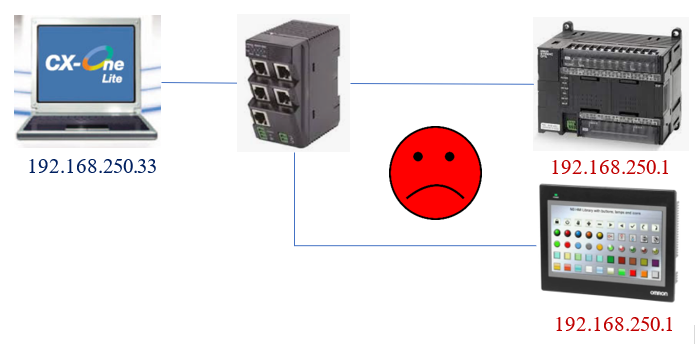
By default, both CP1L-E and NB screen have their IP address set to 192.168.250.1.
If both devices are connected to the same network, it will create a conflict and none of the devices will be accessible. One of the devices must have their IP address changed, let’s see how that’s done.
Solutions
Method 1: change the IP address of the PLC (Easiest)
- Disconnect the Ethernet cable to the NB screen so only the CP1L remains on the network.
- Make sure your laptop IP address is on the same subnet as the PLC (ie. 192.168.250.xxx).
- Open your CX-Programmer project.
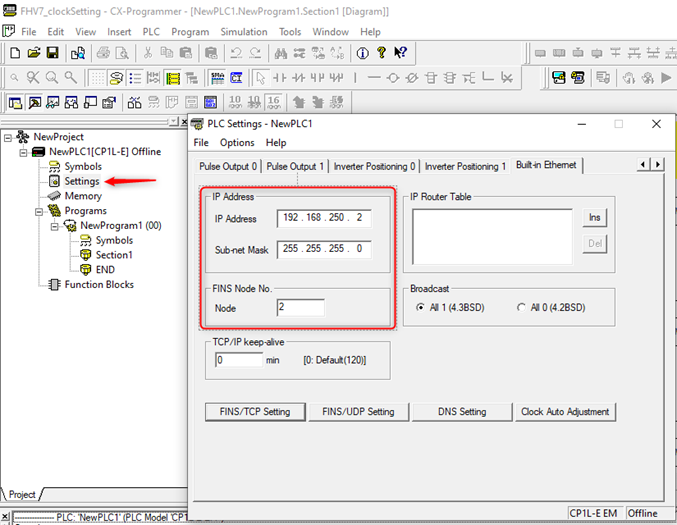
- Go to the PLC Settings → Built-in Ethernet tab and prepare the future IP address e.g. 192.168.250.2. Make sure the FINS Node Number matches the last octet of IP address.
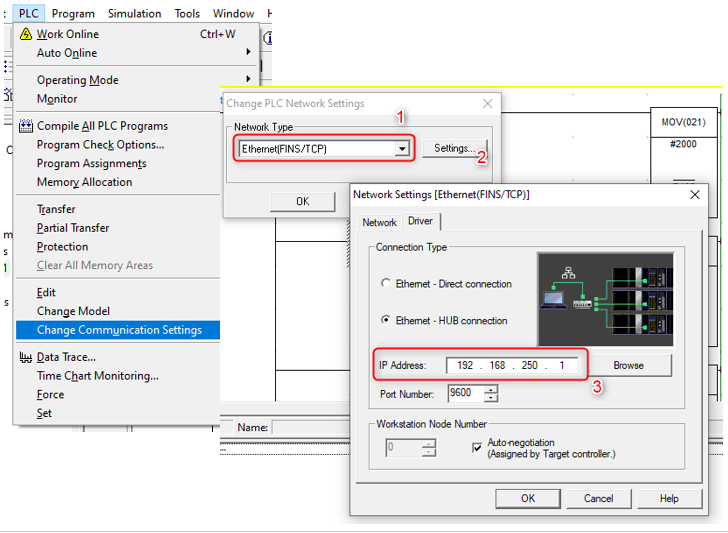
- Go to PLC → Communication Settings. Make sure the Network type is set to Ethernet (FINS/TCP) then press the Settings button. Tick the HUB connection type and enter the current PLC IP address. Click OK.
- Go Online

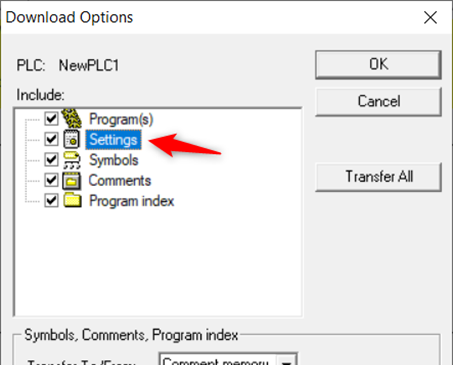
- Transfer to PLC. Make sure to tick Settings as well. Power cycle the PLC for the IP change to apply.
- Repeat step 5 to change CX-Programmer's connection settings to the new IP address of the PLC and get back online.
- Plug back the NB screen cable to the network.
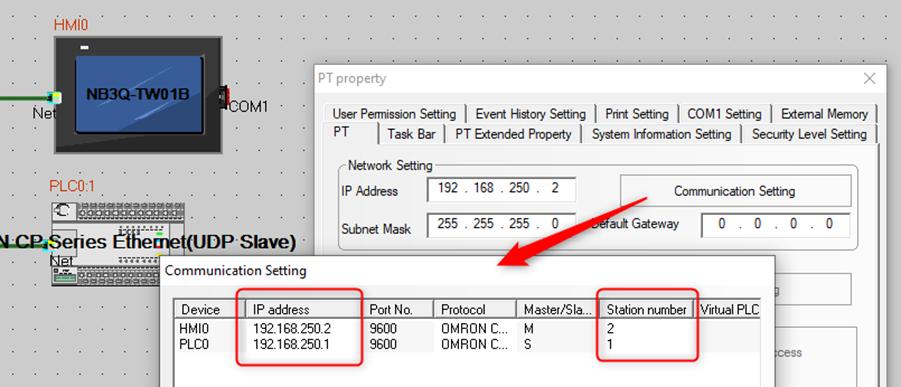
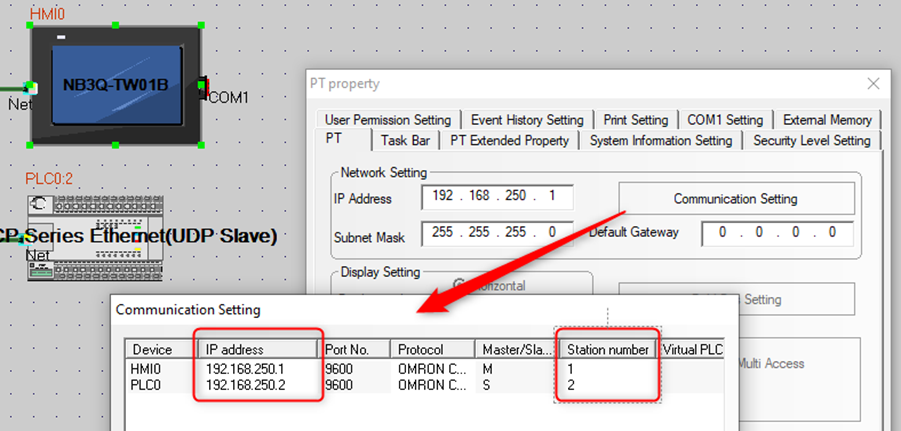
- Remember to change the PLC IP addresses in the NB-Designer project settings so they don’t get overwritten next time the project is downloaded onto the screen. Make sure the Station Number matches the last IP address octet.
Method 2: change the IP address of the NB screen
This is done via the NB touchscreen OR via NB-Designer with a USB cable. This section will present both methods.
Via NB touchscreen
- Power off the touchscreen.
- Set both the DIP switches SW1 and SW2 on the back side to ON.
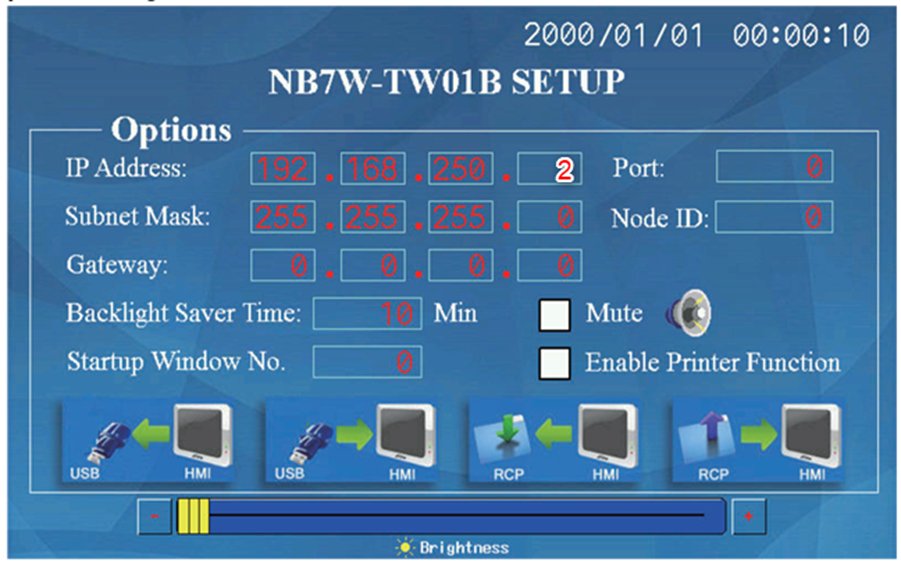
- Power the touchscreen back on. The screen is now in System Settings mode.
- Change the IP address using the touchscreen.
- Power off the screen and reset the DIP switches back to OFF. Power cycle the screen.
Via NB-Designer
- Connect to the NB screen via USB cable.
- Open Window’s Device Manager to make sure the USB driver is correctly installed. Otherwise, install the driver located in C:\Program Files (x86)\OMRON\NB-Designer\driver
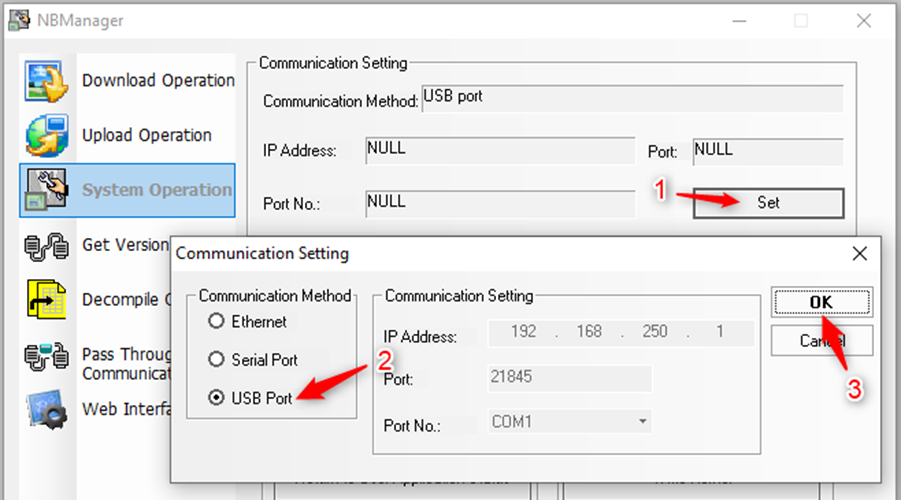
- Open NB-Designer the go to Tools → System Manager
- In Communication Setting, click Set, then select USB port then click OK.
- Enter the new IP address (192.168.250.2) and click on Set.
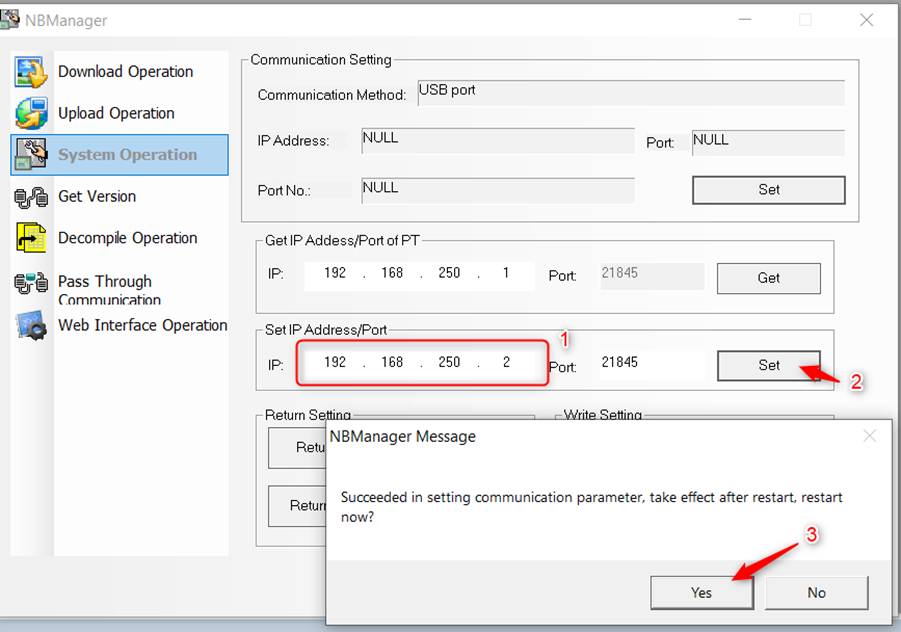
- Remember to change the IP addresses in the project settings so they don’t get overwritten next time the project is downloaded onto the screen. Make sure the Station Number matches the last IP address number.
