Installing Omron Windows Services for Sysmac Studio and CX-Programmer
Purpose and Scope
The purpose of this document is to explain how to install and uninstall the required Windows services for Sysmac Studio USB and Direct Ethernet Utility without performing a complete re installation of Sysmac Studio.
Please note the following procedure requires above average familiarity with the Windows operating system.
Applicable equipment, software and firmware versions
This process has been tested using Windows 10 64 Bit edition and Sysmac Studio 64 bit version 1.42.
Referenced Documents
Please note that with changes to the Windows OS, this procedure may need to be adapted. Always refer to Microsoft help in conjunction with this procedure. The following is the document on which this procedure was created.
Procedure
The following services should be installed and running for the USB and Direct Ethernet utilities to function correctly. These are used for instance to connect Sysmac Studio and CX-Programmer to CPUa and NX couplers via USB, as well as the direct cable ethernet connection to controllers. 
Note the above screen capture shows the three services that should be installed. The status of all three are Running. This is the required status. In order to install services, the .Net command installutil.exe must be used. Note that there are multiple versions of this installutil.exe which exist in different .Net Framework folders according to version. The lowest version existing was arbitrarily used for this procedure. If the procedure fails, perhaps consider using a different version.
The Omron system utilities are located in the directories as follows;- The Omron USB related services;
- C:\Windows\SysWOW64\Omron\PppService\Omron.Cxmw.Modules.Ppp.PppService.exe
- C:\Windows\SysWOW64\Omron\SerialService\Omron.Cxmw.Modules.Serial.SerialService.exe
- The Omron Direct Ethernet utility related service;
- C:\Windows\SysWOW64\Omron\autoip\Omron.Cxmw.Modules.AutoIP.AutoIPService.exe
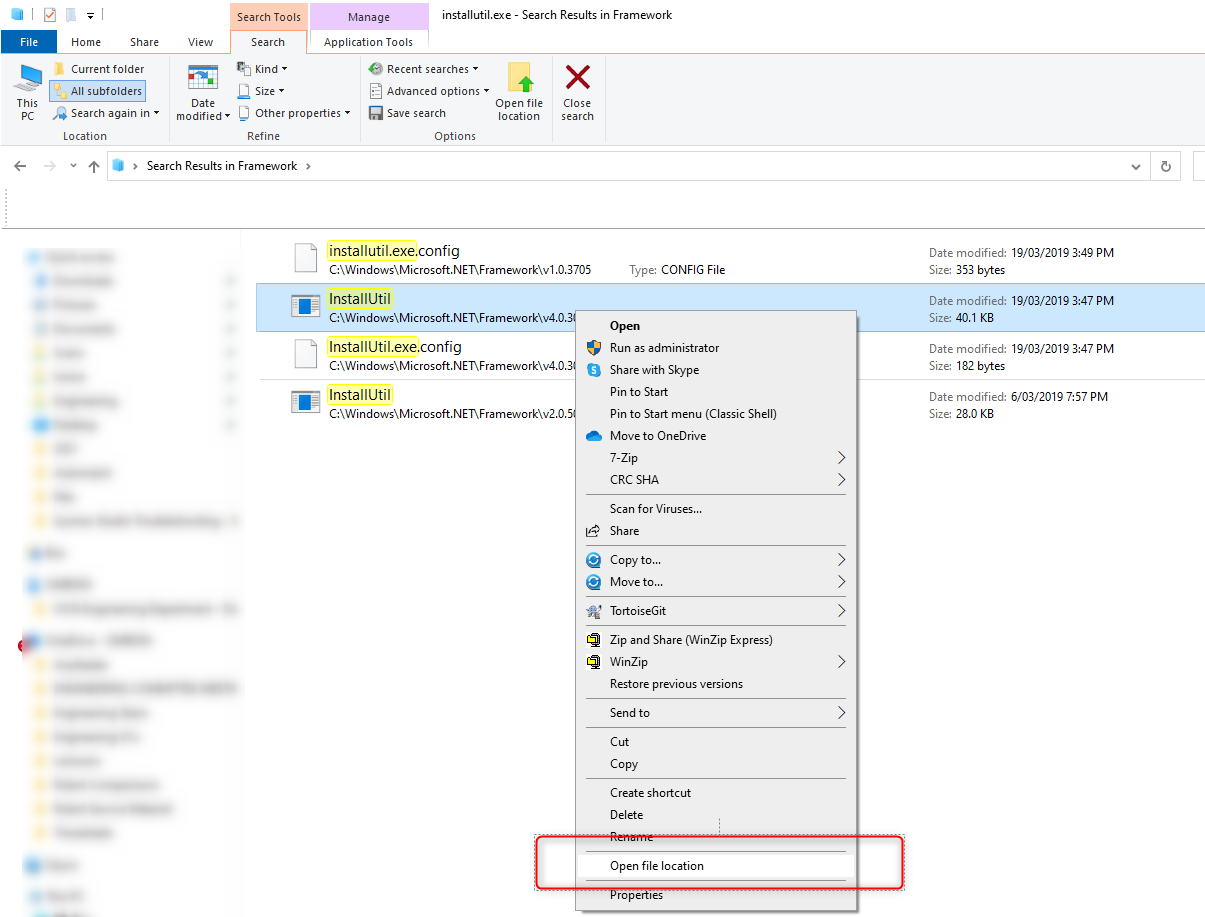
Windows system utilities are installed using the installutil.exe via the command prompt. These are located in subdirectories of the folder C:\Windows\Microsoft.NET\Framework\. Note do not use the C:\Windows\Microsoft.NET\Framework64\ path (this path was tested with Windows 10 64 Bit and Sysmac Studio 64 bit and found that the installutil.exe in the first path works but the second does not work). Use Windows explorer to search for instances of installutil.exe in the C:\Windows\Microsoft.NET\Framework\ folder.
Right click on an instance of the utility and select Open File Location as per below. 
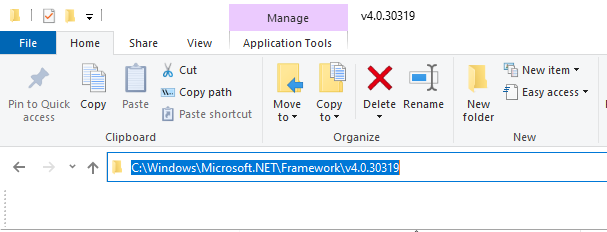
Now click in the path text and copy the text (control C).

Open a Command prompt window as Administrator.
Type cd and press control V to paste the above path.
Then type installutil.exe and copy and paste one of the three services listed.
For instance, the commands to install the direct ethernet utility would be, as per the previous example (which is machine build specific) as follows;
In command prompt (in Administrator mode)
- cd C:\Windows\Microsoft.NET\Framework\v4.0.30319
- Installutil.exe C:\Windows\SysWOW64\Omron\autoip\Omron.Cxmw.Modules.AutoIP.AutoIPService.exe
If an exception error occurs, the service has not been loaded. However if the result is similar to the following the abbreviated result, the service has been installed.
- Microsoft (R) .NET Framework Installation utility Version 4.8.3752.0
- Copyright (C) Microsoft Corporation. All rights reserved.
- Running a transacted installation.
- Beginning the Install phase of the installation.
- ………
- Service OMRON_EDC_Manager has been successfully installed
Now the service must be started manually, unless the machine is rebooted.
Open the Windows service by Ctrl+Alt+Del and select Services tab. The services should now be listed. Right click and select Run to start the services.
Validate that the service status is Running.
Uninstalling an OMRON service
Note the command to uninstall a service is for example
Installutil.exe /u C:\Windows\SysWOW64\Omron\autoip\Omron.Cxmw.Modules.AutoIP.AutoIPService.exe