How to set up the CJ1W-EIP21 card

Written by Jersey Lim
Updated at April 13th, 2023
Introduction
A CJ1W-EIP21 card is used to give Ethernet/IP capabilities to certain CJ PLCs that does not have them, or to expand existing Ethernet/IP networks.
For example, a CJ2M-CPU31 has a built-in Ethernet/IP port which goes up to 32 tag sets. This can be expanded by using a CJ1W-EIP21 card.
DeleteSetting up
A PLC can take up to four CJ1W-EIP21 expansions. The IP address of the PLC is configured both on the physical unit and on CX-Programmer.
The default address for the CJ1W-EIP21 is 192.168.250.1.
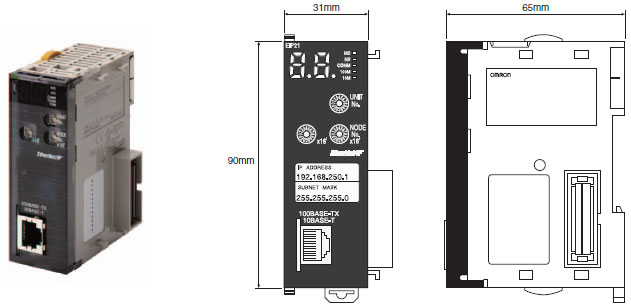
As seen in the image above, there are 3 dials on the CJ1W-EIP21. The top right dial represents the unit number, where as the bottom two dial combined indicates the node address of the EIP card.
- Make sure the PLC is not powered.
- Use a small screwdriver to rotate the dial representing the unit number. This step is only needed if there is more than one CPU Bus Unit mounted to the same controller. The unit number designates the storage location of parameters setting and status of the unit on PLC memory. The memory storage location is base on the formula 1500 + 25*n where n = Unit Number.

- Do the same for the Ethernet/IP node address dial. The left dial sets the 16 digit and the right dial sets the ones digit.

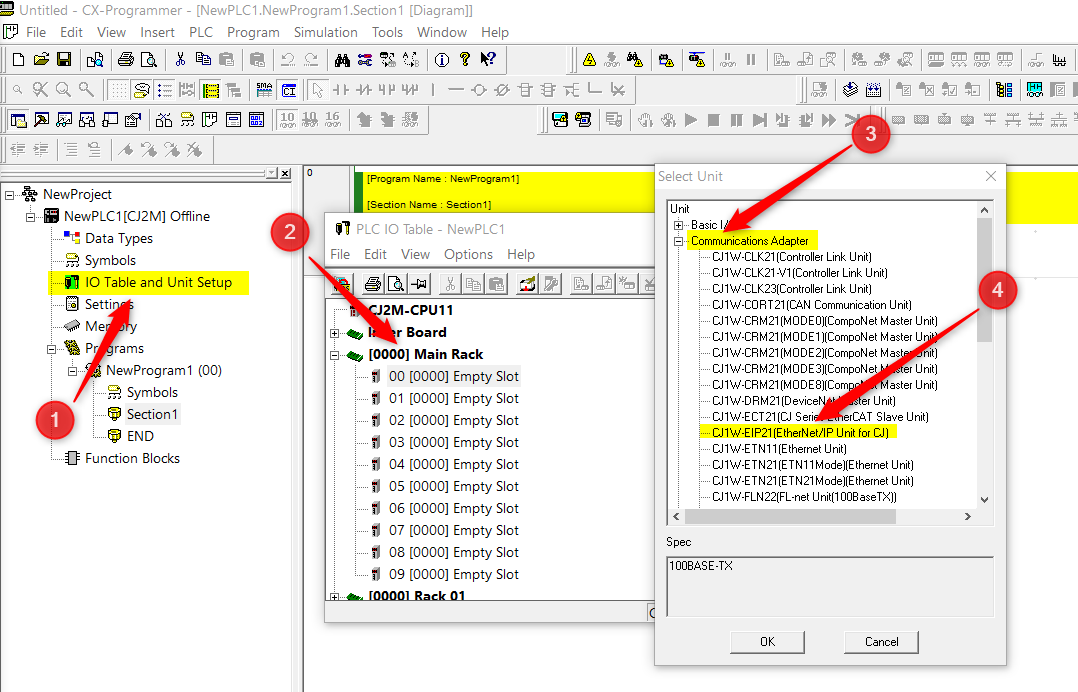
- The IP address is configurable in CX-Programmer. Add the EIP21 card to the relevant rack by selecting the corresponding location. Select "Communications Adapter" and add the CJ1W-EIP21 to the network. The example below is adding a CJ1W-EIP21 directly to a PLC.
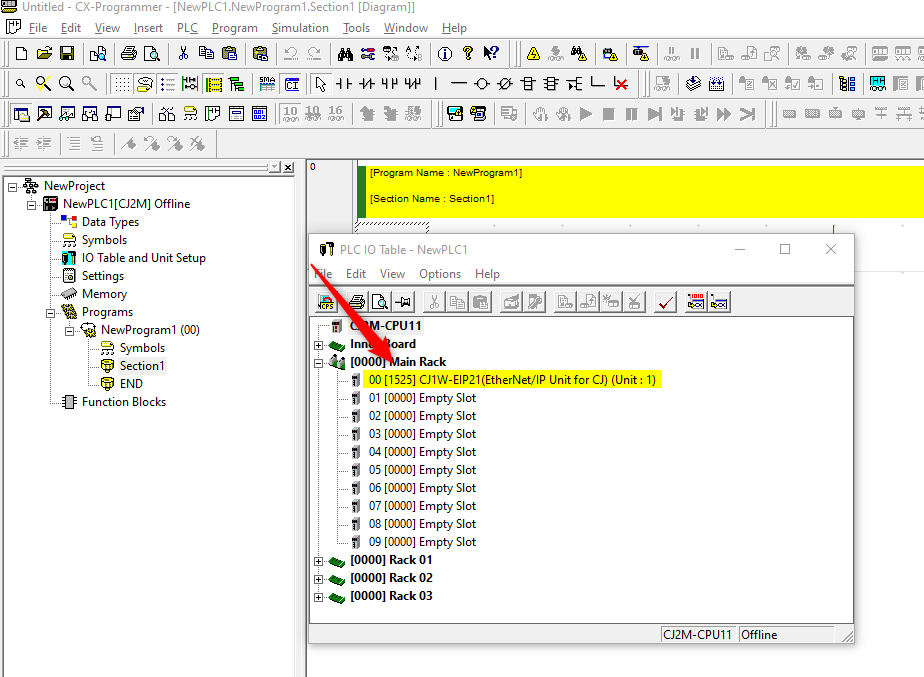
- The card will be added as seen below:
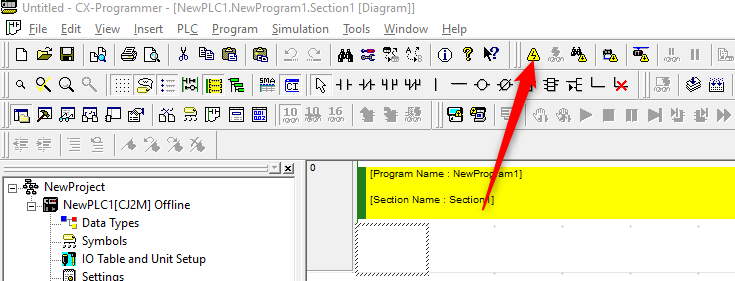
- Go online by clicking the following button:
- Configure the IP address, Subnet Mask and Default Gateway by selecting the following. Transfer to the PLC when the configuration is done.
- Restart power to the PLC. Once this is done, the PLC will use the configuration set.
Transferring data using Ethernet/IP
It is necessary to use Network Configurator to setup connections using the CJ PLC as a master.
Refer to the these articles below for setting up connection using Network Configurator.
Ethernet/IP Setup Guide Using Network Configurator
Major or Minor Revision mismatch for EtherNet/IP Error 0116
Delete