LVS V275 printer Network setup and configuration

Written by Luke Ellacott
Updated at August 28th, 2023
System Requirements
•3 Ethernet cables
1 for Inspection Server PC – Cat 5 or better
1 for V275 Print Inspection System – Cat 6 or better
Zebra Setup utilities
Zebra designer 3
Minimum system Requirements
•OS: Windows 10 64bit
•CPU: Quad Core > 2.4GHz
•RAM: 8GB min.
•500GB storage
•Fully tested browser for V275 UI: Google Chrome™ (78.0.3904.97 or later)
Printer network configuration
The software download to configure the zebra printer can be found at the following link. https://www.zebra.com/ap/en/support-downloads/printer-software/printer-setup-utilities.html
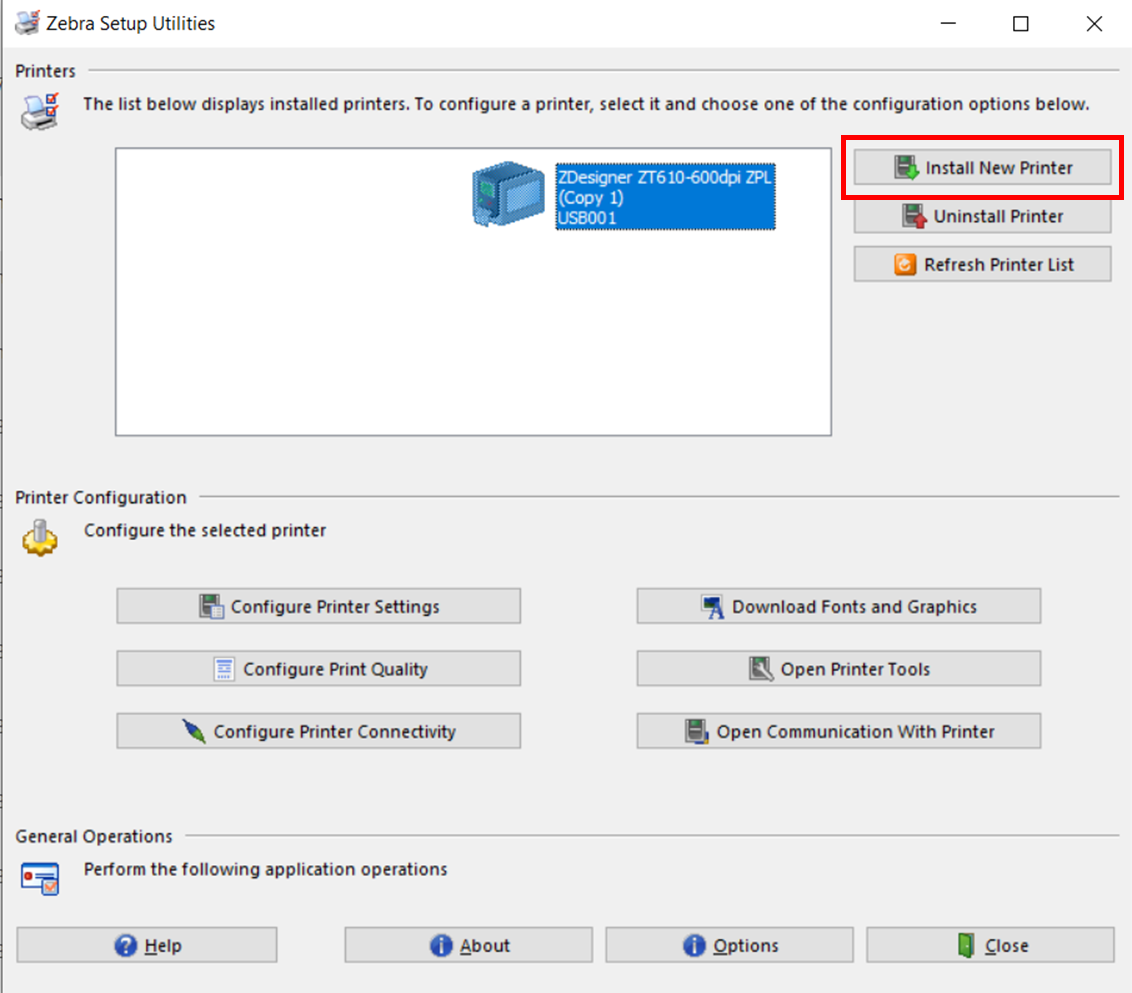
- Open the Zebra setup utilities screen and click on the Install new Printer button.
- Follow the prompts until you see the option to install a new printer and then select the appropriate printer. In this case, the printer required is the ZT610-600dpi.

- Upon clicking next, a screen will show asking if you want to update a existing driver or Add a new printer, select Add new printer. You are prompted for a printer name, and the port the printer will be connected too. When connecting the printer to a network you will need to select the LPT1 port. This will configure the port as a
LAN network.
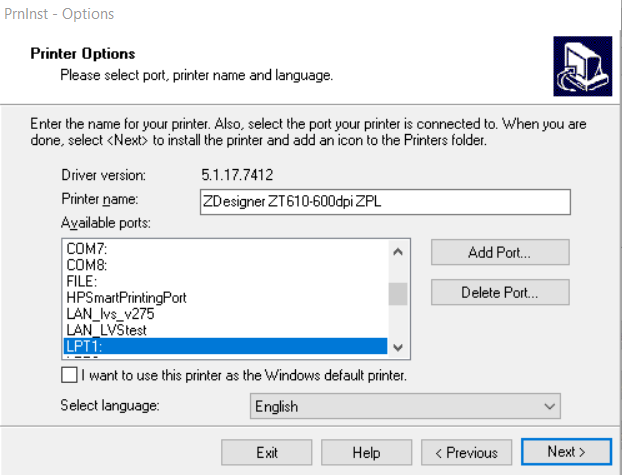
- The wizard prompts to name the port and set the IP address and port number of the printer. Ensure the IP address and port are the same on the physical printer before proceeding.

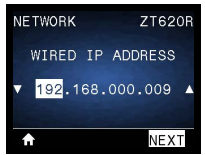
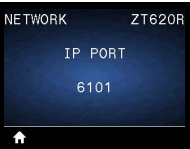
- When completed, the port name you created will show on the available ports. Additionally, when the printer driver is installed, a new printer with the specified LAN port will be listed on the available printers list. On the printer side, the IP port number and address can be found under network > Wired IP address and IP Port.

Printer setup
To setup the printer to accept the appropriate labels and colour settings to print. The below steps will highlight the requirements.
- Double click on the Printer icon that you need setup from Zebra setup utilities. This will open the properties window for the printer.
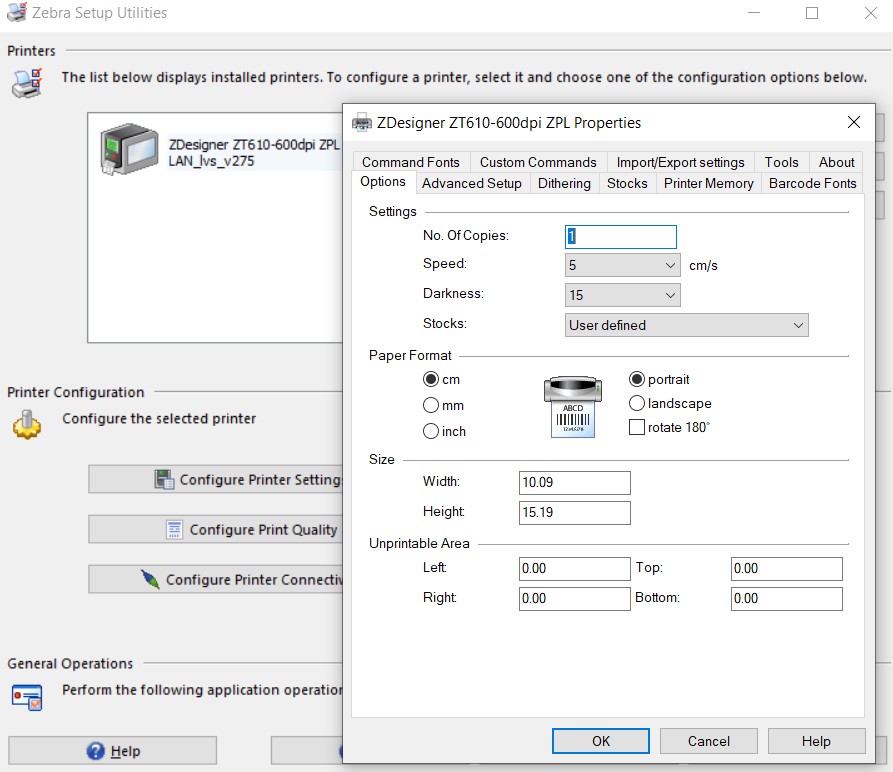
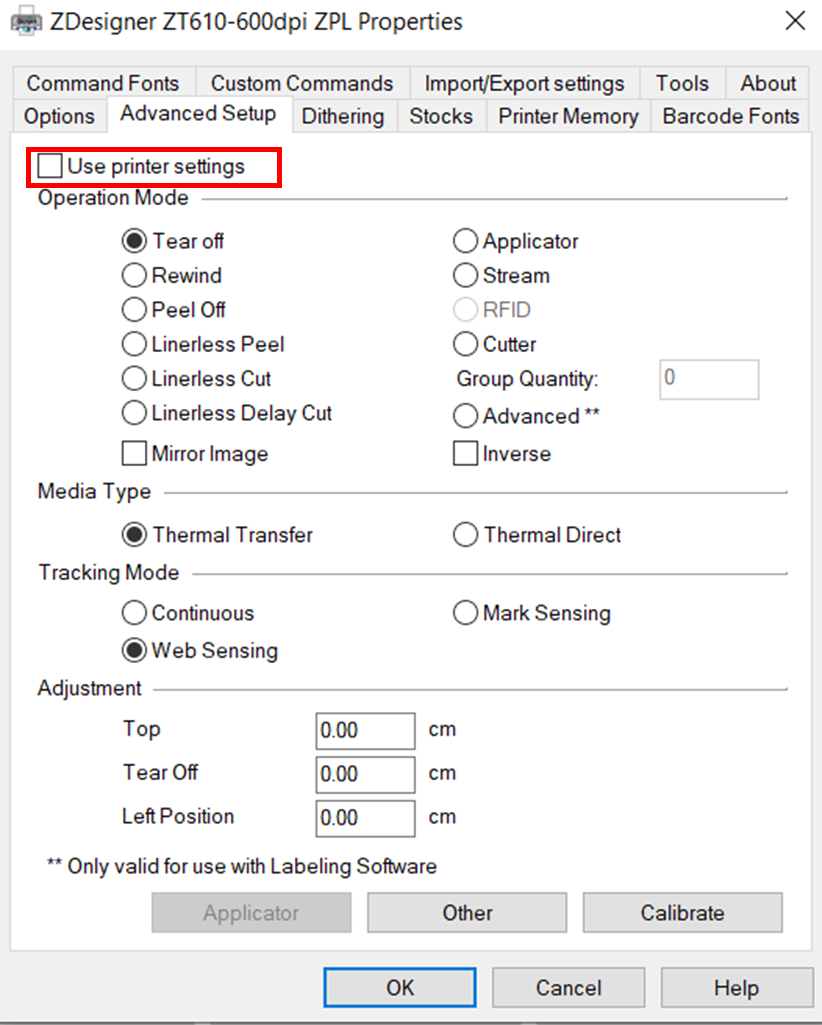
- Under Advanced setup, ensure the settings are correct for your printer. In this case the operation mode is tear off, the media type is thermal transfer. It is aslo important to select ‘Use printer settings’. This ensures the printer wont change the setup if the printer gets powered down.
- In the Zebra designer software, linked here https://www.zebra.com/us/en/support-downloads/printer-software/zebra-designer-3-downloads.html you are able to modify the size of the labels as well as the print speed, darkness and tear-off location.
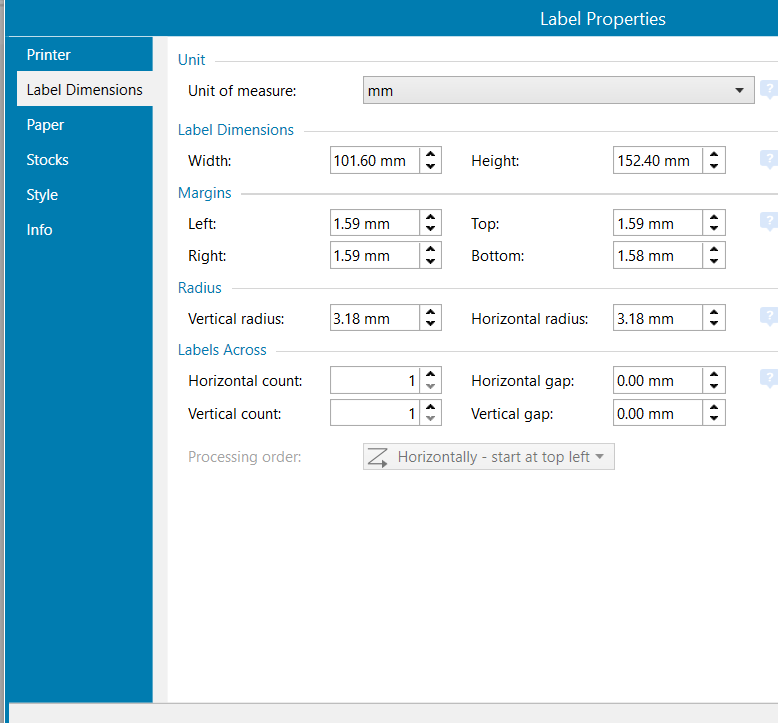
- Zebra designer is also the software used to create labels which can be printed directly on the V275